Discover the Best Mango Ice Cream (Ninja CREAMi) Ever!
There’s nothing quite like a frozen treat on a hot summer day, and making mango ice cream at home with the Ninja CREAMi has become my new obsession. The beauty of this appliance is that it lets me experiment with different flavors, turning almost any fruit into a creamy, delicious dessert. I recently had a box of ripe mangoes sitting in my house, and instead of letting them go to waste, I blended them with coconut milk and a touch of condensed milk for extra sweetness. The result? A smooth and refreshing treat that bursts with juicy mango goodness. But why stop at just one flavor? I’ve also tried mixing peaches, blackberries, and jackfruit, creating unique combinations that taste like summer in every bite. The best part is that even unexpected ingredients, like sweet corn, add a surprising depth of flavor. Whether you’re an ice cream fan or just looking for a fun way to cool down, this is a cold, fruity adventure worth trying.
A Creamy and Refreshing Treat
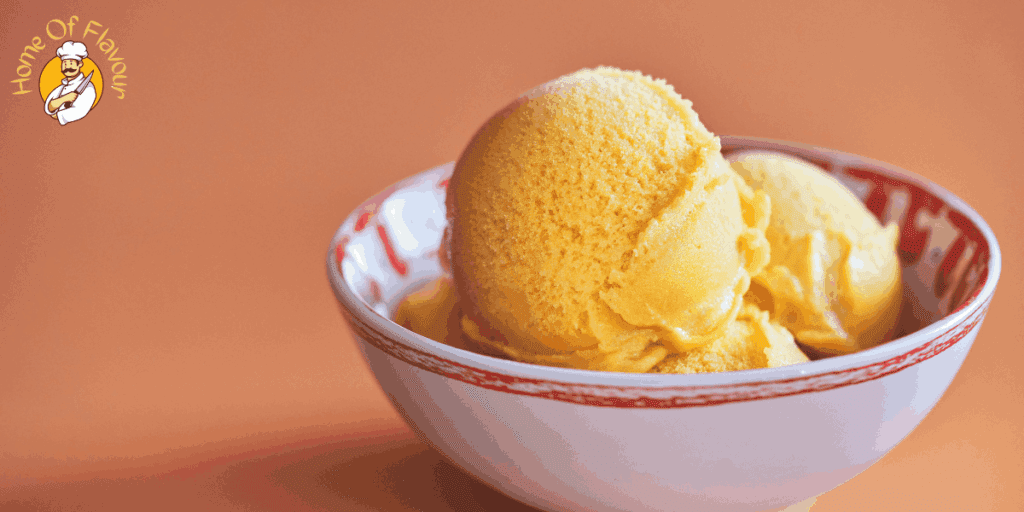
Making mango ice cream with the Ninja CREAMi is a game-changer because it delivers an ultra-smooth, creamy texture without heavy cream or excessive sugar. I love blending mango purée with a simple base like milk yogurt or even go dairy-free with coconut flakes and condensed milk for a naturally sweet, indulgent treat. The best part? It freezes perfectly without forming an ice crystal, giving it a consistency like gelato. This fruity dessert is incredibly refreshing, whether enjoyed on a warm day or as a quick tropical escape. I sometimes toss fresh mango chunks for extra texture or sprinkle on Tajín seasoning for a fun, tangy kick. Plus, it’s easy to make it high-protein or lower in sugar, making it a guilt-free pleasure all summer.
Mango Ice Cream Ingredients
Fresh mango for flavor:
Start with ripe mangoes for a naturally sweet and tropical taste. Blend them into a smooth, pureed mango mixture or chop some for added texture. Using around 400g of mango ensures a rich flavor in every bite.
Creamy Base for a Smooth Texture:
A good creamy base makes all the difference. Use heavy whipping cream, whole milk, and sweetened coconut milk for a rich and silky consistency. If you prefer a lighter version, substitute soy milk or thickened cream.
Sweeteners for the Perfect Balance:
To achieve the right level of sweetness, add granulated sugar, or for a healthier alternative, try monk fruit. This ensures the ice cream stays delicious without being overly sugary.
Color Enhancers for a Vibrant Look:
Use yellow and a few drops of red food coloring for a more golden hue. While this step is optional, it makes the ice cream look as vibrant as it tastes.
Additional Ingredients for Texture and Consistency:
A small amount of cream cheese enhances the texture, making the ice cream scoopable and smooth. To add indulgence, mix in extra mango and finish with a dollop of whipped cream.
Measured Portions for the Perfect Mix:
For the best results, follow these carefully measured portions:
- 1.5 cups of cream
- 1.33 cups of pureed mango
- 1/4 cup, 1/2 cup, or 60ml of liquid ingredients
This perfect balance of ingredients will ensure your mango ice cream is irresistibly smooth and delicious.
Mango Ice Cream Instructions
Preparing the mango mixture:
Start by peeling, cutting, and removing the seed from 2 mangoes. Place them in a food processor and blend until you get pureed mangos. Combine the pureed mangoes in a medium bowl with 1/3 cup granulated sugar, 1 tbsp cream cheese, and your preferred sweetener, such as monk fruit. Whisk everything well until thoroughly combined.
Adding the Creamy Base:
Slowly whisk in whole milk, 3/4 cup thickened cream, and sweetened condensed coconut milk to create a rich and smooth consistency. Mix 2 drops of yellow food coloring and 1 drop of red for a more vibrant color.
Freezing the Mixture:
Once the mixture is ready, pour it into a pint container, ensuring it does not exceed the max fill line. Cover with a pint holder lid, place it in the freezer, and let it sit for 18-24 hours until it becomes firm.
Processing with the Ninja CREAMi:
Remove the pint container from the freezer and secure it inside the outer bowl of the ice cream maker. Attach the lid and lock it into place. Press the ice cream button and let the machine work its magic. If the mixture appears soft or crumbly, use the Respin function for an additional spin to achieve a smooth and creamy texture.
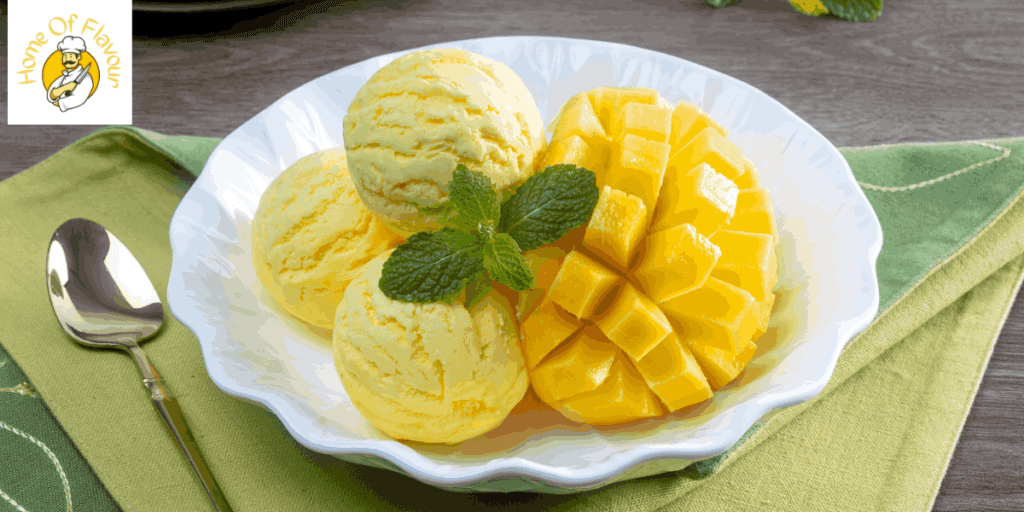
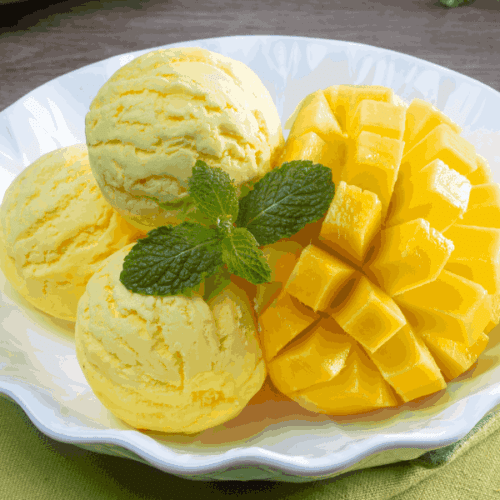
Serving the Ice Cream:
Once ready, release the outer bowl, remove the lid, and scoop the freshly made ice cream into bowls. Serve with extra chopped mango, coconut flakes, or your favorite toppings. Whether you enjoy it immediately or save it for later, this homemade treat is a delicious and refreshing dessert.
Mango Ice Cream Storage Tips
Storing in the Original Pint:
To keep your mango ice cream fresh, always store it in the original pint with a tightly sealed lid to prevent freezer burn and ice crystals from forming.
Storing in the coldest part of the freezer:
For the freshest taste, place it in the coldest part of the freezer, away from the freezer door, where temperature fluctuations can make it too hard.
Restoring creamy texture with Ninja Creami:
If the texture changes, use the Ninja Creami’s Re-Spin function to restore its creamy texture. Add 1-2 tablespoons of milk or another liquid before running the cycle.
Transferring to a Shallow Airtight Container:
You can also transfer it to a shallow, airtight container and place parchment paper or plastic wrap directly on the surface to prevent freezer damage.
Writing the Date on the Lid:
Remember to write the date on the lid with a marker, especially if you batch-make different flavors.
Enjoy Within 1-2 Weeks:
Try to enjoy it within 1-2 weeks for the best experience.
Conclusion
Making mango ice cream with the Ninja CREAMi is a fun and creative way to enjoy a refreshing, creamy treat at home. With simple ingredients like ripe mangoes, a creamy base, and natural sweeteners, you can easily create a delicious, indulgent dessert that is customizable. Whether experimenting with different fruits or going dairy-free, this treat will satisfy your cravings while offering a tropical escape. With proper storage and care, you can keep your mango ice cream fresh and enjoy it for up to two weeks. So, grab your Ninja CREAMi, get creative with flavors, and treat yourself to an incredible, refreshing delight this summer!
(FAQs) Mango Ice Cream (Ninja Creami)
Q1: How do I make mango ice cream with the Ninja CREAMi?
Ans: To make mango ice cream with the Ninja CREAMi, blend ripe mangoes with a creamy base such as coconut and condensed milk. Freeze the mixture for 18-24 hours, then process it in the Ninja CREAMi until smooth. Enjoy a creamy, refreshing treat!
Q2: Can I use other fruits to make ice cream in the Ninja CREAMi?
Ans: Yes! You can experiment with various fruits like peaches, blackberries, and jackfruit. These fruits can be blended with mango for unique and flavorful combinations, offering a fruity adventure in every bite.
Q3: What ingredients do I need for mango ice cream?
Ans: You’ll need fresh mangoes, heavy cream, whole milk, sweetened coconut milk, sugar (or monk fruit), and optional food coloring. Adding cream cheese enhances the texture, while extra mango and whipped cream can make it more indulgent.
Q4: How should I store mango ice cream to keep it fresh?
Ans: Store mango ice cream in the original pint with a tightly sealed lid, ensuring it is placed in the coldest part of the freezer. You can also transfer it to an airtight container to protect and prevent freezer burn.
Mango Ice Cream (Ninja Creami)
Equipment
- Ninja CREAMi Ice Cream Maker
- Food processor or blender
- Medium bowl
- Whisk
- Pint container with a lid
Ingredients
- Fresh Mango for Flavor
- 400 g mango ripe, pureed or chopped
- Creamy Base for a Smooth Texture
- 1.5 cups heavy whipping cream
- 1 cup whole milk
- ½ cup sweetened condensed coconut milk
- Optional: Soy milk or thickened cream as a substitute
- Sweeteners for the Perfect Balance
- ⅓ cup granulated sugar
- Alternative: Monk fruit sweetener for a healthier option
- Color Enhancers for a Vibrant Look
- 2 drops of yellow food coloring
- 1 drop of red food coloring
- Additional Ingredients for Texture and Consistency
- 1 tbsp cream cheese for a smoother texture
- Extra chopped mango for added texture
- Whipped cream for topping
- Measured Portions for the Perfect Mix
- 1.33 cups pureed mango
- ¼ cup 1/2 cup, or 60ml liquid ingredients
Instructions
- Preparing the Mango Mixture
- Peel, cut, and remove the seed from 2 mangoes.
- Place them in a food processor and blend until smooth.
- In a medium bowl, combine:
- 1.33 cups pureed mango
- 1/3 cup granulated sugar
- 1 tbsp cream cheese
- Preferred sweetener (e.g., monk fruit)
- Whisk everything until thoroughly combined.
- Adding the Creamy Base
- Slowly whisk in:
- 1 cup whole milk
- 3/4 cup thickened cream
- 1/2 cup sweetened condensed coconut milk
- For a more vibrant color, mix in:
- 2 drops of yellow food coloring
- 1 drop of red food coloring
- Freezing the Mixture
- Pour the mixture into a pint container, ensuring it does not exceed the max fill line.
- Cover with a pint holder lid and place in the freezer.
- Let it freeze for 18-24 hours until firm.
- Processing with the Ninja CREAMi
- Remove the pint container from the freezer and place it into the outer bowl of the Ice Cream Maker.
- Attach the lid and lock it into place.
- Press the Ice Cream button and let the machine work its magic.
- If the mixture appears soft or crumbly, use the Respin function for an additional spin to achieve a smooth and creamy texture.
- Serving the Ice Cream
- Release the outer bowl, remove the lid, and scoop the freshly made ice cream into bowls.
- Top with:
- Extra chopped mango
- Coconut flakes
- Your favorite toppings
- Enjoy immediately or store for later as a delicious and refreshing dessert.
Notes
This recipe allows for endless experimentation with flavors like peaches, blackberries, jackfruit, and even sweet corn, giving each batch a unique taste.
Dairy and Non-Dairy Options Available
The creamy base can be made with heavy whipping cream, whole milk, sweetened condensed coconut milk, or dairy-free alternatives like soy milk or thickened cream for a lighter version.
Perfectly Smooth Texture
The Ninja CREAMi ensures an ultra-smooth, creamy texture without forming ice crystals, similar to gelato.
Quick Preparation but Requires Freezing Time
The preparation takes about 10 minutes, but freezing requires 18-24 hours, making it ideal for preparing ahead of time.
Storage Tips for Freshness
Store in the original pint container with a tightly sealed lid, or use a shallow, airtight container with parchment paper or plastic wrap to prevent freezer burn.
Guilt-Free and Naturally Sweet
Sweetened with monk fruit, granulated sugar, or coconut milk, this ice cream can be made lower in sugar while maintaining a rich, fruity taste.