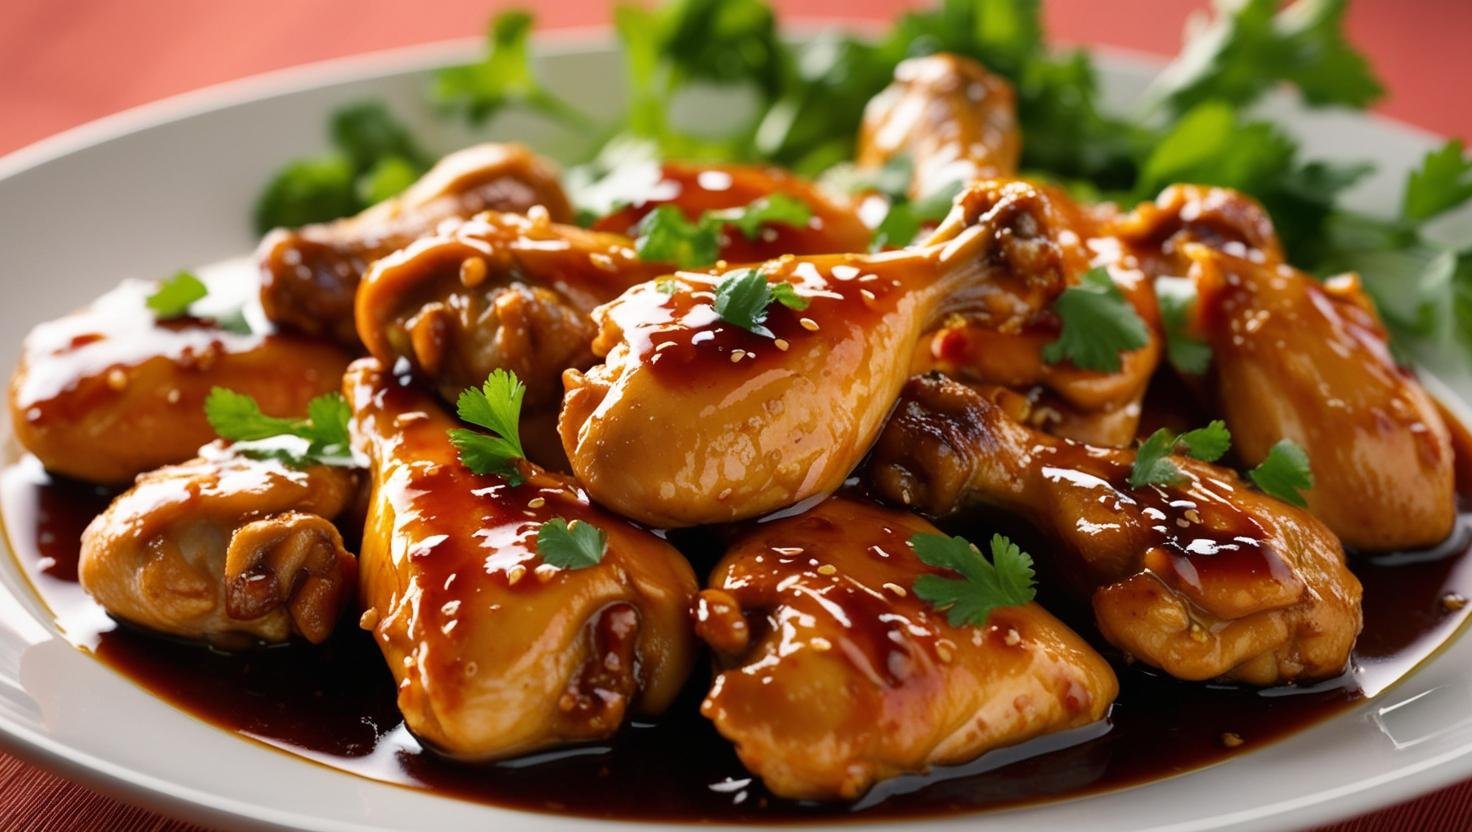
Easy Soy Garlic Chicken Recipe (Better Than Takeout!)
Introduction
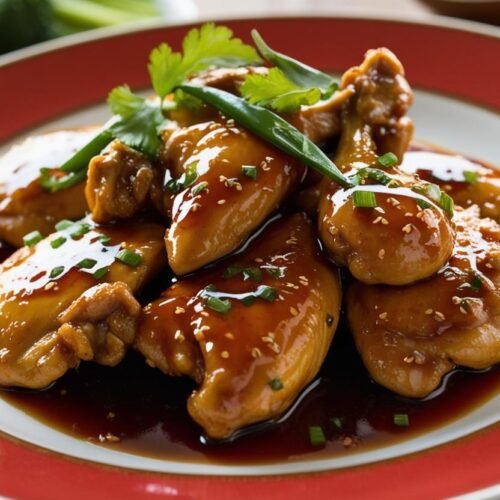
If you’re looking for a meal that’s quick to make but feels like it came straight from your favorite restaurant, soy garlic chicken is about to become your new obsession 🍗.
Imagine tender chicken, baked until juicy and golden, coated in a sticky glaze packed with the rich savoriness of soy sauce and the irresistible aroma of garlic 🧄. It’s the kind of dish that makes you stop after the first bite and think, “Wow, I made this?”
The best part? You don’t need fancy ingredients or complicated steps. Just a handful of pantry staples and a little time in the oven — that’s it ✅. Whether you’re cooking for yourself, your family, or even trying to impress friends, this recipe delivers big flavor with very little effort.
Soy Garlic Chicken brings bold, comforting flavors to your plate in under an hour, making it perfect for busy weeknights or relaxed weekends 🍽️. Once you try it, you’ll understand why this sweet, savory, and slightly sticky chicken quickly becomes a household favorite. Get ready to add a new classic to your kitchen!
Why You’ll Love This Recipe
- Flavor Explosion: Sweet, salty, and garlicky — every bite bursts with bold, addictive flavors 💥.
- Quick and Easy: Minimal prep and ready in under an hour — ideal for busy nights 🕒.
- Family Favorite: Loved by adults and kids alike — even picky eaters 😋.
- Budget-Friendly: Made with simple, affordable pantry staples 💰.
- Better Than Takeout: Fresh, clean flavors without mystery ingredients 🍱.
Ingredients You’ll Need
- 1.5 lb chicken thighs (bone-in or skin-on)
- Large Onion (cut into wedges)
- Ground Black Pepper
- Minced Garlic
- Freshly Grated Ginger (optional, but highly recommended)
- Olive Oil
- Sesame Oil
- Honey
- Soy Sauce
- Sesame Seeds (for garnish)
- Green Onions (for garnish)
🛒 These easy ingredients create a rich, glossy sauce that clings to every piece perfectly.
Step-by-Step Instructions
- Preheat your oven to 390°F (200°C) 🔥.
- Place chicken thighs skin-side down in a 9×13-inch baking dish along with the onion wedges.
- In a bowl, mix black pepper, minced garlic, freshly grated ginger, olive oil, sesame oil, honey, and soy sauce.
- Pour the sauce evenly over the chicken, coating every piece.
- Bake for 25 minutes, then flip the chicken pieces and bake another 25 minutes until golden and cooked through 🍗. Adjust cooking time if needed.
- Spoon the rich sauce over the chicken after baking for maximum flavor.
- Garnish with sesame seeds and green onions for a fresh, colorful finish 🌱.
✨ Each simple step brings you closer to that unforgettable sticky glaze and juicy bite.
Expert Tips for the Best Results
- Trim excess skin for a cleaner, lighter dish ✂️.
- Lightly salt the chicken before baking to boost natural flavors 🧂.
- Double the sauce if you love extra glaze — it’s too good not to have more 😍.
- Use fresh ginger for a brighter, fresher taste 🌟.
- Watch the baking time to keep the chicken tender and juicy 🕵️.
🔑 Little details make a huge difference when creating a dish everyone will rave about.
Serving Suggestions
- Spoon over fluffy rice to soak up all that amazing sauce 🍚.
- Pair with noodles tossed in sesame oil for a fun twist 🍜.
- Add steamed broccoli or green beans for color and freshness 🥦.
- Serve with a cucumber salad for a crisp, refreshing side 🥒.
🍽️ This dish fits perfectly into any meal, any day of the week.
Variations & Substitutions
- Swap chicken cuts: Try boneless thighs, drumsticks, or even wings 🍗.
- Honey substitute: Use maple syrup but slightly reduce the amount 🍯.
- Gluten-free option: Swap soy sauce with tamari for a gluten-free version 🥢.
- Spice it up: Add red pepper flakes or a dash of sriracha if you like heat 🌶️.
- Veggie boost: Toss in bell peppers, snap peas, or bok choy during baking 🥬.
🛠️ Customize it to fit your taste and pantry without losing any of the magic.
Conclusion
When you need a fast, flavorful dinner that feels like a treat, Soy Garlic Chicken is the answer ✨.
The sticky glaze, juicy meat, and rich, savory-sweet flavors make it a standout meal with almost no stress.
Perfect for cozy nights, busy weekdays, or meal prep Sundays, this dish proves you don’t have to spend hours in the kitchen to create something amazing.
💬 One bite and you’ll know why it’s earned a permanent spot in kitchens everywhere. Trust me, you’ll want this recipe on repeat!
Soy Garlic Chicken: (FAQs)
1. Can I use chicken breasts instead of thighs?
Yes, you can. Just keep an eye on the baking time since chicken breasts cook faster than thighs and can dry out if overbaked.
2. How should I store leftovers?
Allow the chicken to cool completely before transferring it to an airtight container. Store it in the refrigerator for up to 5 days.
3. Can I make Soy Garlic Chicken in an air fryer?
Absolutely. Preheat the air fryer to 390°F and cook the chicken for 15–20 minutes, flipping halfway through. Brush the sauce over the chicken toward the end for maximum flavor.
4. What vegetables pair best with Soy Garlic Chicken?
Steamed broccoli, roasted carrots, sautéed green beans, and a crisp cucumber salad are all excellent sides that complement the rich flavors of soy garlic chicken.
5. How can I make the sauce thicker?
After baking, you can simmer the sauce on the stovetop until it thickens naturally. Alternatively, mix 1 teaspoon of cornstarch with 1 tablespoon of water and stir it into the sauce to thicken it quickly.
Soy Garlic Chicken
Ingredients
- 1.5 lb chicken thighs bone-in or skin-on
- 1 large onion cut into wedges
- 1 teaspoon ground black pepper
- 1 tablespoon minced garlic
- 1 –2 tablespoons freshly grated ginger optional, but highly recommended
- 1 teaspoon olive oil
- 1 teaspoon sesame oil
- ¼ cup honey
- ¼ cup soy sauce
- Sesame seeds for garnish
- Green onions thinly sliced (for garnish)
Instructions
- Preheat your oven to 390°F (200°C) 🔥.
- Arrange the chicken thighs skin-side down in a 9×13-inch baking dish along with the onion wedges.
- Mix the black pepper, minced garlic, grated ginger, olive oil, sesame oil, honey, and soy sauce in a small bowl 🥣.
- Pour the sauce evenly over the chicken and onions, coating each piece well.
- Bake for 25 minutes. Then flip the chicken pieces and bake another 25 minutes until the chicken is golden and fully cooked ✨. Adjust cooking time if necessary.
- Spoon the rich pan sauce over the chicken after baking for extra flavor 😋.
- Garnish with sesame seeds and green onions before serving 🌿.
Notes
- Let the chicken cool completely.
- Store in an airtight container in the refrigerator for up to 5 days.
- Microwave: Heat gently for 1–2 minutes until warm.
- Stovetop: Warm in a skillet over low heat until heated through.
- Add a splash of water or extra sauce when reheating to keep it moist