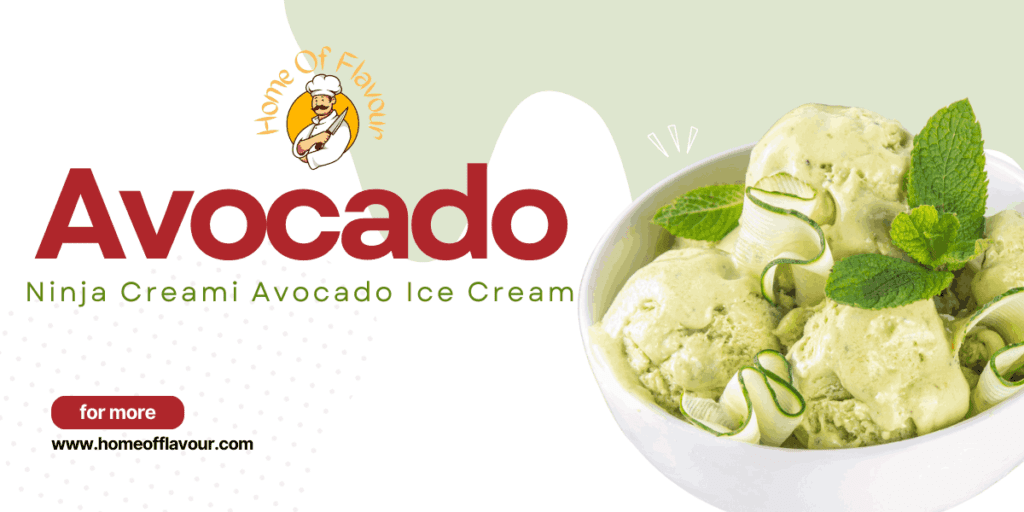
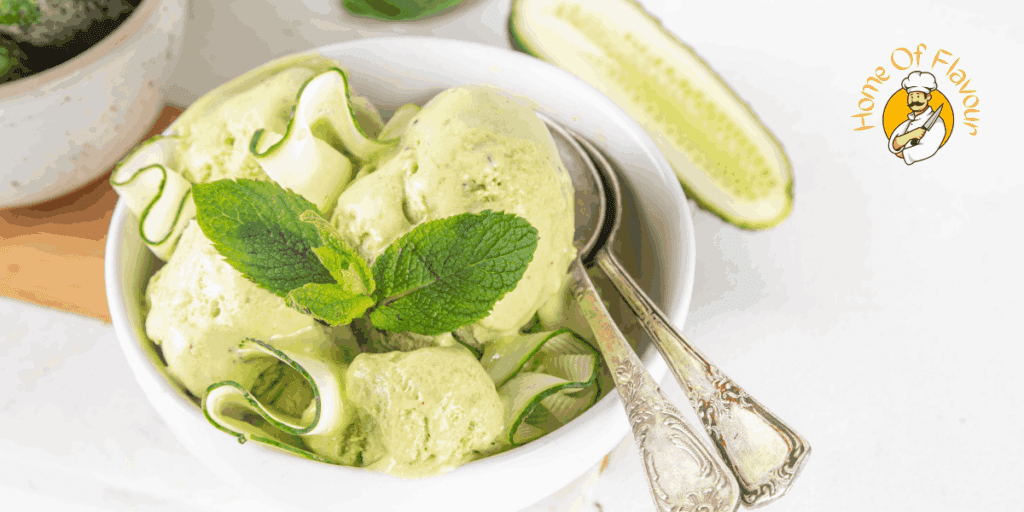
Ninja Creami Avocado Ice Cream
Overview
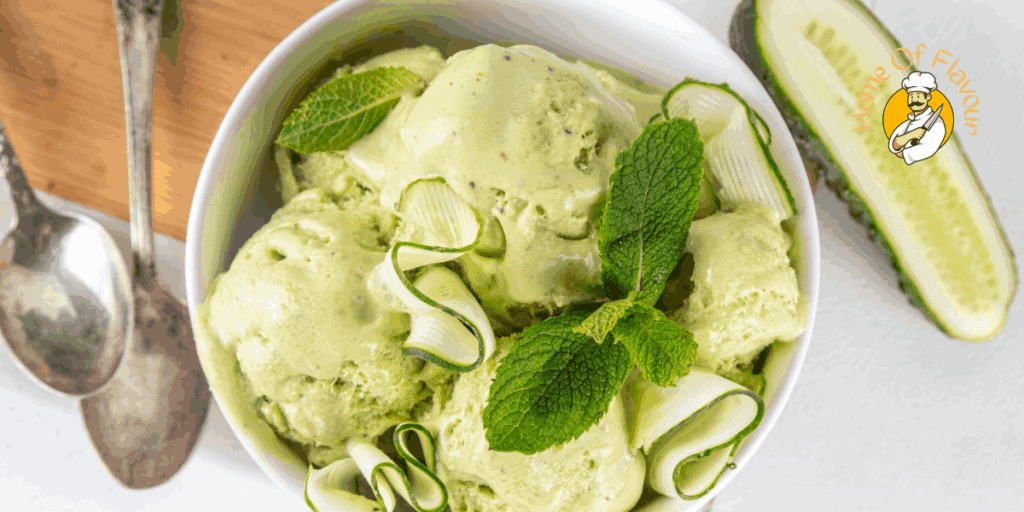
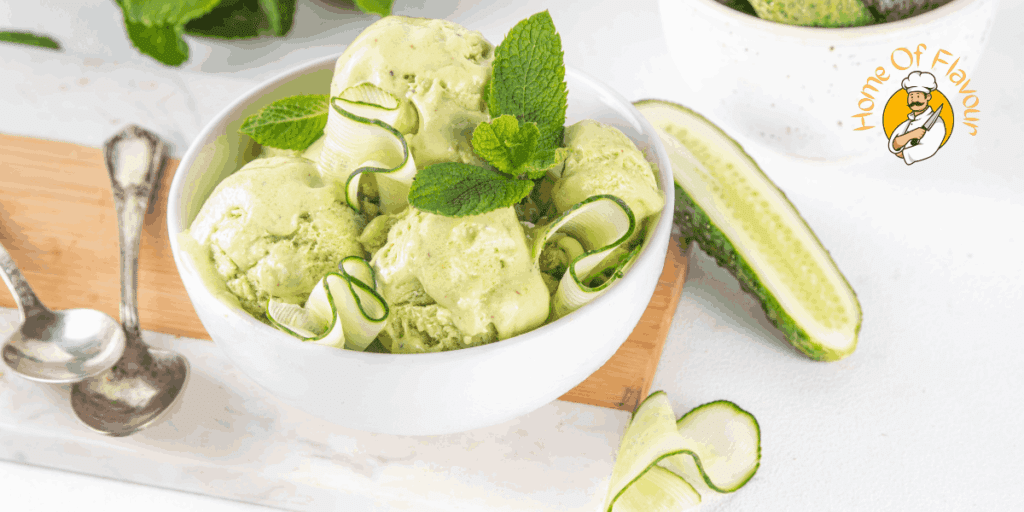
If you’re looking for a creamy, smooth, and refreshingly unique frozen dessert, this Ninja Creami Avocado Ice Cream is just what you need! Made with fresh avocados, vanilla, and a blend of rich ingredients, this ice cream delivers a luscious texture with a naturally sweet twist. Unlike traditional ice cream packed with artificial additives, this homemade version is customizable—adjust the sweetness, swap in plant-based options, or get creative with mix-ins.
You can whip up this treat effortlessly with the Ninja Creami, an ice cream maker, or even a high-powered blender. The best part? It’s indulgent yet guilt-free, perfect for satisfying your sweet tooth without any heaviness. Serve it in a cone, bowl, or even toast (trust me, it’s delicious).
Why You’ll Love This Recipe
Naturally Creamy and Smooth
Thanks to ripe avocados, this ice cream has a velvety texture without excess cream or butter.
A Healthier Alternative
Packed with heart-healthy fats and naturally lower in saturated fat than traditional ice cream, it’s a smart way to indulge.
Quick and Easy
There are no complicated steps here—blend, freeze, and churn! It’s perfect for busy days when you need a sweet pick-me-up.
Customizable to Your Taste
Adjust the sweetness, add mix-ins like chocolate chips or coconut, or make a dairy-free version with plant-based ingredients.
A Crowd-Pleaser
It may sound unconventional, but once people taste how silky and delicious this avocado ice cream is, they’ll return for more!
Ingredients
Base Ingredients
- 4 large ripe avocados
- 6 medium ripe avocados (for extra creaminess)
- 2 cups heavy cream
- 2 cups half-and-half
- 2 cups full-fat canned coconut milk
- 2 cups sour cream
Sweeteners & Flavoring
- 1½ cups granulated sugar (or sugar substitute)
- ½ cup condensed milk
- 1 teaspoon vanilla extract
- 2 tablespoons freshly squeezed lime juice
- Pinch of salt
Optional Add-Ins
- 2 cups fresh mint leaves (for a refreshing touch)
Instructions
Step 1: Prepare the Ice Cream Base
- Peel and pit the avocados, then place them in a blender or food processor.
- Add the half-and-half sour cream, heavy cream, coconut milk, vanilla extract, lime juice, condensed milk, and sugar.
- Blend until smooth and thoroughly combined.
Step 2: Freeze the Mixture
- Pour the blended mixture into a freezer-safe pint container.
- Freeze for 18 to 24 hours to allow it to firm up.
Step 3: Churn the Ice Cream
- Take the frozen mixture out of the freezer.
- Place it in the Ninja Creami machine and select the churn or ice cream setting according to the machine’s instructions.
- Process until you get a creamy, silky consistency.
Step 4: Serve and Enjoy
- If you love soft-serve ice cream, dig in right away!
- Let it sit at room temperature for 30 minutes before scooping for a firmer texture.
- Try serving it in a cone, a bowl, or toast for an unexpected but delicious twist!
Topping Ideas
- Crunchy Goodness – Chopped nuts like pistachios or almonds, toasted coconut flakes
- Sweet Enhancements – A drizzle of honey, dark chocolate chips, or a sprinkle of cinnamon
- Fresh and Fruity – Raspberries, blueberries, or strawberries
Storage Instructions
- Store any leftovers in an airtight, freezer-safe container for 2–3 weeks.
- Place a sheet of parchment paper directly on top to prevent ice crystals before sealing the container.
- Before serving, let it sit at room temperature for a few minutes or re-spin it in the Ninja Creami for a freshly churned texture.
- Looking to mix things up? Try making chocolate or toasted coconut avocado ice cream for a fun variation!
Final Thoughts
I know avocado ice cream might sound unusual, but trust me—one bite and you’ll be hooked. The creaminess, the subtle sweetness, the endless possibilities for toppings… it’s an absolute game-changer.
So, grab those avocados, fire up your Ninja Creami, and treat yourself to an indulgent and nourishing frozen dessert. Because who says you can’t have it all? 🍦💚
FAQs for Ninja Creami Avocado Ice Cream
1. Can I make this ice cream without a Ninja Cream?
Yes! While the Ninja Creami helps achieve an ultra-creamy texture, you can still make this ice cream using a high-powered blender or food processor. After blending the ingredients, freeze the mixture in a freezer-safe container for about 18-24 hours. If it becomes too hard, let it sit at room temperature for a few minutes or re-blend before serving.
2. How do I make a dairy-free version of this ice cream?
To make this recipe dairy-free, substitute the heavy cream, half-and-half, and sour cream with plant-based alternatives such as:
- Full-fat coconut milk (for a creamy texture)
- Almond or cashew cream (for a rich, nutty taste)
- A dairy-free yogurt alternative (for a tangy twist)
This will keep the ice cream smooth while maintaining its rich flavor.
3. How can I make this ice cream sweeter or less sweet?
The sweetness level is fully customizable! Here’s how you can adjust it:
- Increase the sugar and condensed milk, or add a drizzle of honey or maple syrup for a sweeter ice cream.
- Reduce the sugar or use a sugar substitute like monk fruit sweetener, erythritol, or stevia for a less sweet version.
- Ripe bananas or dates also work great if you prefer a natural sweetener.
4. Can I add chocolate to this avocado ice cream?
Absolutely! Avocado and chocolate are a fantastic combination. You can customize the recipe by:
- Mixing in dark chocolate chips or cocoa nibs.
- Adding 2-3 tablespoons of unsweetened cocoa powder to the blended mixture before freezing.
- Swirling in melted dark chocolate for a fudge-like effect.
- Creating a chocolate-avocado version by using chocolate-flavored plant-based milk.
5. How long does this ice cream last in the freezer?
This homemade avocado ice cream can be stored in an airtight, freezer-safe container for 2-3 weeks. To prevent ice crystals from forming:
- Press a parchment paper or plastic wrap directly onto the surface before sealing the lid.
- When ready to eat, let it sit at room temperature for about 5-10 minutes or re-spin in the Ninja Creami for a fresh, creamy texture.
So, grab those avocados, fire up your Ninja Creami, and treat yourself to an indulgent and nourishing frozen dessert. Because who says you can’t have it all? 🍦💚
Ninja Creami Avocado Ice Cream
Equipment
- Blender or food processor – For blending ingredients into a smooth mixture
- Ninja Creami or ice cream maker – For churning and achieving the perfect texture
- Freezer-safe pint container – For freezing and storing the ice cream
Ingredients
- 4 large avocados
- 6 medium ripe avocados
- 2 cups heavy cream
- 2 cups half-and-half
- 2 cups full-fat canned coconut milk
- 2 cups sour cream
- Sweeteners & Flavoring
- 1.5 cups granulated sugar or sugar substitute
- ½ cup condensed milk
- 1 teaspoon vanilla extract
- 2 tablespoons freshly squeezed lime juice
- Pinch of salt
- Optional Ingredients
- 2 cups fresh mint optional
Instructions
- Step 1: Prepare the Base
- Peel and pit the avocados, then place them in a blender or food processor.
- Add the half-and-half, sour cream, heavy cream, vanilla extract, lime juice, and condensed milk.
- Blend until smooth and fully combined.
- Step 2: Freeze the Mixture
- Pour the blended mixture into a freezer-safe container.
- Freeze for 18 to 24 hours to allow it to firm up properly.
- Step 3: Churn the Ice Cream
- Once frozen, remove the mixture from the freezer.
- Place it into your Ninja Creami machine and select the churn setting, following the manufacturer’s instructions.
- Process until the ice cream reaches a smooth, creamy consistency.
- Step 4: Serving and Toppings
- If you prefer soft ice cream, serve immediately.
- For a firmer texture, let the ice cream sit at room temperature for about 30 minutes before scooping.
- Enhance your treat with toppings like:
- Chopped nuts – Pistachios, almonds
- Sweet additions – Dark chocolate chips, a drizzle of honey
- Fresh fruit – Raspberries, blueberries, or strawberries
- Enjoy this indulgent yet wholesome dessert!
Video
