🥕 Easy Radish Kimchi Recipe (Kkakdugi)—Crunchy, Spicy & Fermented Korean Side Dish
Overview
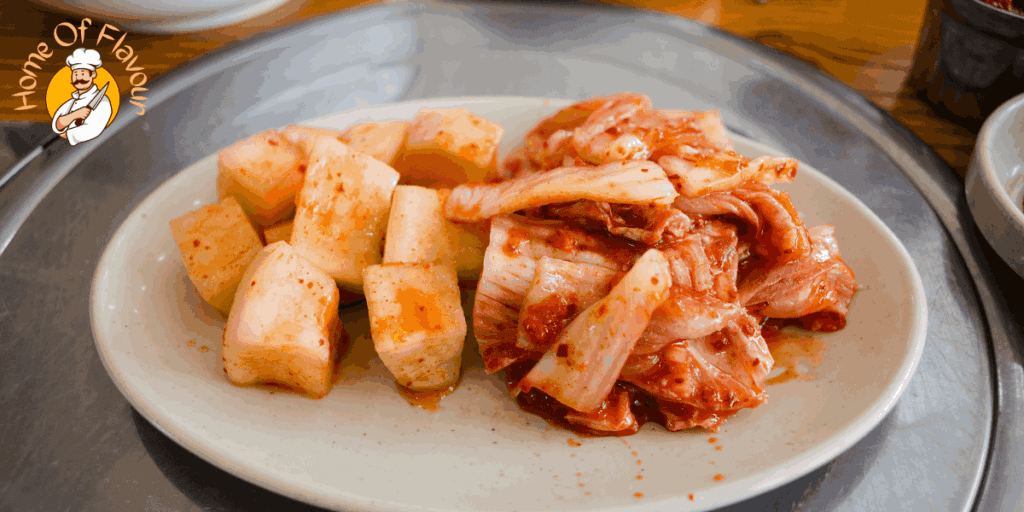
Among the many variations of kimchi (김치), radish kimchi (깍두기), or Kkakdugi, stands out with its crunchy texture and bold, spicy-sweet flavors. Unlike baechu kimchi (napa cabbage kimchi), this version is made with Korean radish (moo radish), which holds up beautifully during fermentation.
📅 Best Season to Make It: October to December, when radishes are at their peak flavor and texture.
🌱 Key ingredients: Korean radish, gochujang (Korean chili flakes), fish sauce, saeujeot (preserved shrimp), and garlic.
🕒 Quick Fermentation: Flavors start developing within an hour and deepen over time.
Fermented radish kimchi naturally produces a briny liquid, helping it absorb the spices while softening its sharp, raw spiciness. Over time, it develops a mellow, tangy, and umami-rich taste, making it a versatile side dish.
Why You’ll Love This Recipe
✔ Easy to Make: A quick and simple preparation process.
✔ Crunchy & Flavorful: The radish stays crisp while soaking up bold seasonings.
✔ Gut-Healthy: Packed with probiotics that aid digestion.
✔ Versatile Pairing: Enjoy as a side dish; mix into fried rice, stews, noodles, or eggs.
🥢 Ingredients for Kkakdugi (Radish Kimchi)
🔹 Equipment Needed
- Large mixing bowl
- Blender
- Mandoline (optional for thin slices)
- Medium-sized bowl
- Food prep gloves
- Plastic wrap
- Glass jar or non-reactive container (e.g., a canning jar)
- Fermentation weight
- Airlock lid (optional but helpful for controlled fermentation)
🔹 Radish & Vegetables
- 1.1 kg – 1.4 kg (3 pounds) Korean radish or daikon radish
- 3–5 stalks of green onion, chopped
- 1 red apple, finely chopped (for natural sweetness)
- 1 brown onion, finely chopped
🔹 Seasonings & Fermentation Enhancers
- ⅔ cup (4 Tbsp) gochujang (Korean chili flakes)
- 2 Tbsp – ¼ cup fish sauce, anchovy sauce, or Peugeot (Korean salted shrimp)
- Vegan alternative: Use soy sauce.
- 5–6 garlic cloves, minced
- 1 Tbsp (10g) minced ginger
- 2 Tbsp Diamond Crystal kosher salt (or Korean coarse salt)
- 2 tsp sugar (balances fermentation)
🔹 Fermentation Starter (Kimchi Porridge)
- ¼ cup rice flour
- 30 ml water
🥣 Step-by-Step Guide: How to Make Radish Kimchi (Kkakdugi) at Home
Step 1: Prepare the Radish
Peel and cut the radish into ¾ to 1-inch cubes, adjusting the size to your preference. If you prefer a finer texture, you can slice, shred, or julienne using a mandoline. Place the radish in a large bowl, sprinkle it with salt and sugar, and toss well to evenly coat. Let it sit at room temperature for 30 minutes to absorb excess moisture. Once softened, rinse the radish thoroughly with cold water, drain well, and pat dry to remove any extra salt.
Step 2: Make the Kimchi Base
Combine chopped onion, chopped apple, and fish sauce (or soy sauce for a plant-based option) in a blender. Blend until smooth, creating a fragrant and slightly sweet base that will enhance the depth of flavor in the kimchi.
Step 3: Prepare the Rice Porridge (Fermentation Starter)
In a medium bowl, mix rice flour and water until smooth. Heat the mixture in a microwave for 1 minute until it thickens into a mildly runny porridge. Let it cool completely, then mix in gochujang (Korean chili flakes), the blended kimchi base, garlic, ginger, and other seasonings to form a rich, flavorful paste.
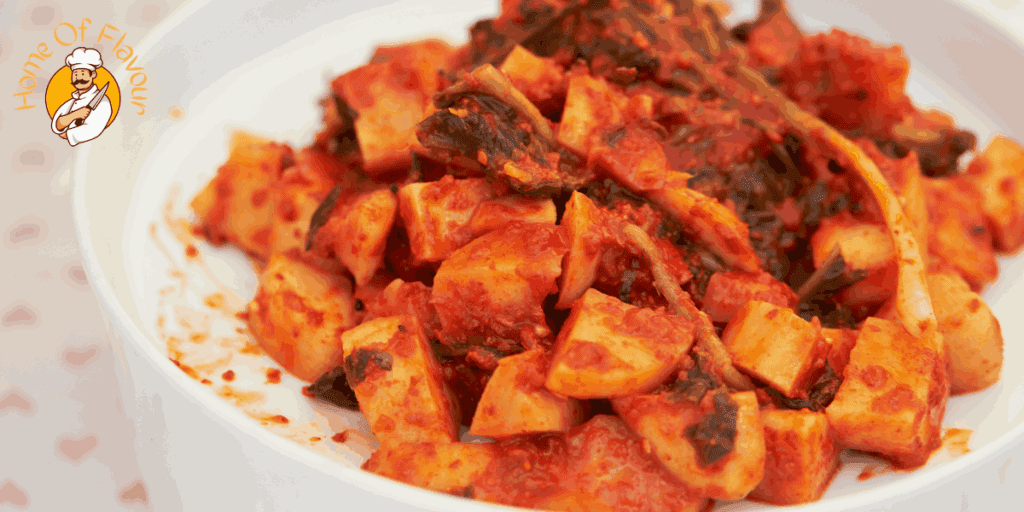
Step 4: Coat the Radish
Add the chopped green onions, prepared kimchi paste, and radish cubes in a clean mixing bowl. Wearing food prep gloves, gently massage the paste into the radish, ensuring that each piece is evenly coated in the bright red seasoning. The radish will absorb the flavors, taking on its signature deep red color.
Step 5: Start Fermentation
Transfer the coated radish into a clean glass jar or non-reactive fermentation container. Press it firmly to remove air pockets, ensuring the radish is fully submerged in its brine. Cover the container with plastic wrap, place a fermentation weight on top, and seal with an airlock lid (optional). Let the jar sit at room temperature for 6–24 hours, depending on the warmth of your kitchen.
Step 6: Storing & Fermentation
After 24 hours, check for tiny bubbles in the liquid, indicating that fermentation has begun. For best results, store the kimchi in the fridge at 6°C (42.8°F) or lower to slow the fermentation process. While the kimchi can be eaten fresh, the best flavors develop after about 14 days, creating a perfectly balanced, tangy, and umami-rich profile.
🍽 How to Serve & Use Radish Kimchi
Classic Serving Ideas
- As a banchan (Korean side dish) with steamed rice.
- With Korean soups & stews like seolleongtang (beef bone soup).
- On top of Korean BBQ (samgyeopsal, bulgogi).
Creative Ways to Use Kkakdugi
- Mix into kimchi fried rice 🍚.
- Add to scrambled eggs or pancakes 🥞.
- Toss into ramen or noodles 🍜.
- Use as a topping for tacos 🌮 (Korean-Mexican fusion).
How Long Does Kkakdugi Last?
Properly stored in the fridge at 4°C (39°F) or lower, radish kimchi stays fresh for up to 3 months. The fermentation process changes the flavor over time.
- Fresh (1–3 days): Crunchy, mildly spicy, and sweet.
- After 2 Weeks: Stronger umami, more balanced tanginess.
- After 1 Month: Deeply fermented, tangy, and intensely flavorful.
🔍 Radish Kimchi: (FAQs)
Q: How long does it take for radish kimchi to ferment?
The fermentation process starts within 6–24 hours at room temperature, depending on the warmth of your kitchen. Let it ferment in the fridge for at least 14 days for the best flavor. The longer it ferments, the stronger and tangier the taste becomes.
Q: Can I make radish kimchi without fish sauce or shrimp?
Yes! For a vegan-friendly alternative, replace fish sauce or saeujeot (salted shrimp) with soy sauce or a combination of miso paste and seaweed broth for a rich umami flavor.
Q: Why is my radish kimchi too watery?
Radish naturally releases moisture during fermentation, creating a briny liquid. If it’s too watery, ensure you’ve salted and drained the radish properly before mixing in the seasoning.
Q: How do I know when my kkakdugi is ready to eat?
Fresh kkakdugi can be eaten immediately, but it tastes best after at least 2 weeks of fermentation. You’ll know it’s ready when it develops a slightly sour, tangy, and umami-rich flavor with a bubbly brine.
Q: Can I freeze radish kimchi?
Freezing is not recommended, as it alters the texture and makes the radish mushy. Instead, store it in the fridge at 4°C (39°F) or lower for up to 3 months.
Q: What are the best dishes to pair with radish kimchi?
Kkakdugi pairs well with steamed rice, Korean soups (seolleongtang, kimchi jjigae), BBQ (samgyeopsal, bulgogi), and noodles. It can also be used in fried rice, eggs, ramen, or even tacos for a fusion twist.
Q: Why is my kimchi not fermenting properly?
If your kimchi isn’t fermenting, check these factors:
- Temperature: Fermentation slows down in a cold environment. Keep it at room temperature for at least 6–24 hours before refrigerating.
- Salt Balance: Too much salt can prevent proper fermentation. Use Korean coarse salt or Diamond Crystal kosher salt in the right amount.
- Air Exposure: Ensure the radish is fully submerged in its brine to prevent mold.
🍽 Final Thoughts Radish Kimchi
Radish kimchi (Kkakdugi) is a bold, crunchy, and probiotic-rich dish that enhances any meal with its spicy, tangy, and umami-packed flavor. Whether you enjoy it fresh or fully fermented, it’s a delicious and versatile side dish that brings authentic Korean flavors to your table.
📢Try This Recipe & Share Your Experience!
Have you made this homemade radish kimchi? Let us know in the comments below! 📸 Tag us on social media with your kimchi creations—we’d love to see them! Don’t forget to share this recipe with friends who love Korean food!
Radish Kimchi
Equipment
- Large mixing bowl
- Blender
- Mandoline (optional)
- Medium-sized bowl
- Microwave
- Food prep gloves
- Plastic wrap
- Glass container or non-reactive container (such as canning jar)
- Fermentation weight
- Airlock lid
Ingredients
- Radish and Vegetables
- 1.1 kg 1.4 kg, or 3 pounds of Korean radish or daikon radish (depending on batch size)
- 3 stalks or 5 scallions of green onion or scallions
- 1 red apple chopped finely
- 1 brown onion chopped finely
- Seasoning and Flavor Enhancers
- ⅔ cup or 4 Tbsp of Korean chili flakes or Korean chile powder or coarse ground gochugaru
- 2 tablespoons to ¼ cup of fish sauce anchovy sauce, or saeujeot (Korean salted shrimp)
- Optional: Soy sauce plant-based alternative for fish sauce
- 5 or 6 cloves or 12 garlic cloves minced or whole
- About 10 g or 1 Tbsp of minced ginger
- Fermentation and Balance
- 2 Tbsp or 1 tablespoon plus 1 teaspoon of Diamond Crystal kosher salt Korean coarse salt, or rock salt
- 2 teaspoons or 1 ½ Tablespoon of sugar
- ¼ cup of rice flour
- 30 ml of water
Instructions
- 🥣🔹 Step 1: Prepare the Radish
- Peel and cut the radish into ¾ to 1-inch cubes (adjust to preference).
- If you prefer a finer texture, you can slice, shred, or julienne using a mandoline.
- Salt the radish: Place it in a large bowl, sprinkle salt and sugar, and toss well.
- Let it sit at room temperature for 30 minutes to draw out excess moisture.
- Rinse with cold water, drain, and pat dry to remove any extra salt.
- 🔹 Step 2: Make the Kimchi Base
- In a blender, combine:
- Chopped onion
- Chopped apple
- Fish sauce (or soy sauce for a plant-based option)
- Blend until smooth.
- 🔹 Step 3: Prepare the Rice Porridge (Fermentation Starter)
- In a medium bowl, mix rice flour and water until smooth.
- Heat in a microwave for 1 minute until it thickens into a mildly runny porridge.
- Let it cool, then mix it with:
- Gochugaru (Korean chili flakes)
- Blended kimchi base
- Garlic, ginger, and other seasonings
- 🔹 Step 4: Coat the Radish
- In a clean mixing bowl, add:
- Chopped green onions
- Prepared kimchi paste
- Radish cubes
- Massage the paste into the radish (wear food prep gloves).
- Ensure the radish is evenly coated in the bright red seasoning.
- 🔹 Step 5: Start Fermentation
- Transfer the coated radish into a clean glass jar.
- Press down firmly to remove air pockets.
- Cover with plastic wrap, add a fermentation weight, and seal with an airlock lid (optional).
- Let sit at room temperature for 6–24 hours depending on warmth.
- 🔹 Step 6: Storing & Fermentation
- After 24 hours, check for bubbles (a sign fermentation has begun).
- Store in the fridge at 6°C (42.8°F) or lower to slow fermentation.
- Best flavors develop after 14 days but can be eaten sooner.
- 🥡 Storage Tips
- ✅ Fridge: Keeps up to 3 months at 4°C (39°F).
- ✅ Freezing: Not recommended, as texture changes.
- 🔹 Flavor Timeline:
- Fresh (1–3 days): Crunchy, mildly spicy.
- 2 Weeks: Stronger umami, balanced heat.
- 1 Month+: Deeply fermented, tangy, intense.
Notes
Adjust chili flakes based on spice preference
Store in airtight containers to maintain freshness
Fermentation time may vary depending on the kitchen's temperature
Nutrition Value (Per Serving ~100-150g)
Calories: 40-50 kcalCarbohydrates: 8-10g
Protein: 1-2g
Fats: <1g
Fiber: 2-4g
Sodium: 500-700mg (varies based on salt usage)
Probiotics: High due to fermentation process