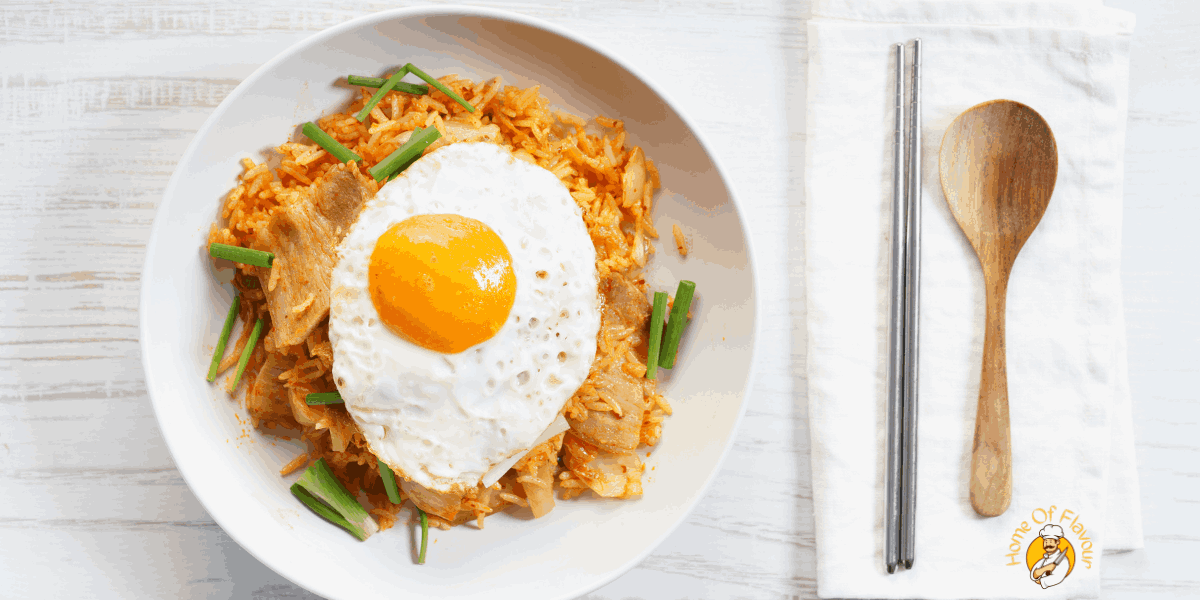
There’s something undeniably comforting about turning leftovers into something crave-worthy—and Kimchi Fried Rice (Kimchi Bokkeumbap) is a perfect example. With just a handful of basic ingredients—like day-old rice, fermented kimchi, and a perfectly cooked egg—you can whip up a dish that’s bold, spicy, and deeply satisfying. Whether you’re just discovering Korean flavors or already a fan, this guide will help you make it like a pro.
❤️ Why You’ll Love Kimchi Fried Rice
This dish has earned its place as a staple in Korean homes for good reason:
- ⏱️ Quick & Easy: Ready in under 30 minutes—perfect for busy weeknights.
- 🧩 Endlessly Customizable: Toss in tofu, Spam, mushrooms, or whatever’s in the fridge.
- 🌶️ Bold & Balanced Flavor: Thanks to kimchi, soy sauce, and sesame oil, every bite is punchy and rich.
- 🌍 Reduces Waste: Cold rice and leftover kimchi finally have a delicious purpose.
🛒 What You’ll Need
Here’s a simple base to build on. Feel free to get creative:
- 🍚 1 cup day-old cooked rice (short or medium grain is best)
- 🥬 ½ cup chopped kimchi
- 🥄 2 tbsp kimchi juice
- 🧅 1 small onion, diced
- 🧄 2 cloves garlic, minced
- 🥚 1–2 eggs (scrambled into the rice or fried on top)
- 🧂 1 tsp soy sauce
- 🌰 1 tsp toasted sesame oil
- 🛢️ 1 tbsp neutral oil (vegetable, canola, or sunflower)
Optional add-ins: 🧀 Spam, 🧄 tofu, 🥩 leftover meat, 🥕 carrots, 🧊 frozen vegetables, 🍄 mushrooms
Garnishes: 🌿 Green onions, ⚪ Sesame seeds, 🟦 Seaweed flakes, 🌶️ Gochugaru, 🔴 Gochujang
💡 Tip: Day-old rice works best. It’s drier and less sticky, which makes for better texture when frying.
🥬 Choosing the Right Kimchi
The star of this dish is undeniably kimchi, so choosing the right type makes a big difference. Here’s what to look for:
Use Well-Fermented Kimchi
- For bold, tangy, and deeply savory flavor, go for aged kimchi—the kind that’s been in the fridge for a while. The longer it ferments, the more complex and punchy the taste.
- Fresh kimchi is milder and crunchier, but may not provide the same depth or richness in fried rice.
Cabbage vs. Radish Kimchi
- Napa cabbage kimchi (Baechu kimchi) is the most common and works beautifully for this recipe.
- Radish kimchi (Kkakdugi) can also be used, but chop it finely for even texture and flavor distribution.
Check for Additives
- If you’re vegan or vegetarian, check the label to avoid kimchi made with fish sauce, anchovy extract, or shrimp paste. Many grocery stores now carry plant-based kimchi.
Use the Juice!
- Don’t skip the kimchi juice—it adds acidity, umami, and that signature zing. It helps season the rice without needing too much soy sauce.
💡 Pro Tip: If your kimchi’s extra sour, balance it out with a dash of sugar while cooking.
👨🍳 How to Make It: Step-by-Step
Step 1: Prep Everything First 🧤
Chop the onion, mince the garlic, dice your kimchi, and measure out your seasonings. If you’re using frozen veggies, thaw them slightly. Break up the cold rice with your hands or a spoon to help it cook evenly.
Step 2: Heat Your Pan 🔥
Place a skillet or wok over medium-high heat. Add 1 tablespoon of oil and let it heat until shimmering.
Step 3: Sauté the Aromatics 👃
Add the diced onion and minced garlic. Stir-fry for about a minute, until they turn soft and fragrant—this sets the base for all that deep umami flavor.
Step 4: Add Your Extras 🥓🍄
Toss in any proteins or vegetables—Spam, tofu, mushrooms, or whatever you’ve got. Cook for 2–3 minutes, letting them brown slightly for extra texture.
Step 5: Add the Kimchi 🥬
Stir in the chopped kimchi and kimchi juice. Let it cook for 1–2 minutes to deepen its flavor and cook off any excess moisture.
Step 6: Mix in the Rice 🍚
Add your rice to the pan and break up any clumps with a spatula. Stir well to combine everything. Lightly press the rice down to create a crispy layer at the bottom—this adds a delightful crunch.
Step 7: Season to Taste 🧂🌶️
Drizzle in soy sauce and sesame oil. If you like it spicy, stir in a bit of gochujang or sprinkle some gochugaru. Taste and adjust as needed.
Step 8: Cook the Eggs 🥚
There are two great ways to do this:
- Scrambled: Push the rice to one side, pour beaten eggs into the pan, scramble, then mix them in.
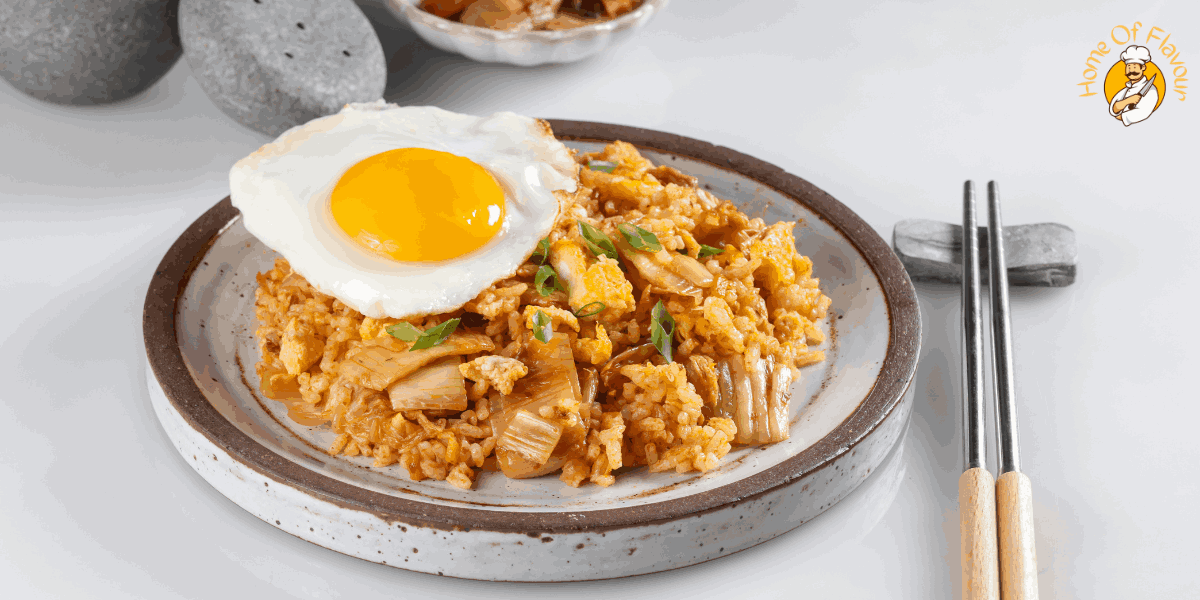
- Fried: Cook the egg separately and serve it on top. The rich, runny yolk adds a creamy touch—this one’s my favorite.
Step 9: Garnish and Serve 🎉
Turn off the heat. Top with green onions, sesame seeds, and seaweed flakes. Serve hot and enjoy immediately.
🍋 Optional: Add a splash of rice vinegar for a subtle tangy edge.
🚀 Why It Beats Takeout
Kimchi Fried Rice isn’t just fast—it’s better than delivery:
- 🥗 Healthier: You control the oil, salt, and ingredients.
- 🍽️ Tastier: It’s smoky, spicy, and full of personal touches.
- 💰 Budget-friendly: Uses ingredients you likely already have.
- 🎒 Versatile: Serve it solo, as a side, or pack it into lunchboxes.
Once you try it, you’ll understand why it’s a go-to comfort dish around the world.
💭 Final Thoughts
Kimchi Fried Rice is more than a quick fix—it’s a cozy, flavorful way to reinvent your leftovers into something amazing. All it takes is a little prep, a hot pan, and a few pantry staples to create a dish that tastes like it came straight from a Korean kitchen.
So, open the fridge, grab that jar of kimchi you’ve been saving, and give this a go. It just might become your new favorite.
Let your kitchen fill with the toasty scent of sesame oil and garlic—and savor every spicy, crispy, comforting bite. 🥢🔥
Simple Kimchi Fried Rice Recipe (FAQs)
- Can I use freshly cooked rice instead of day-old rice?
Yes, but for best results, let the rice cool and dry out slightly first. Freshly cooked rice can be too moist and sticky, which may lead to a mushy texture when stir-fried. - Is Kimchi Fried Rice spicy?
It has a mild to moderate spice level, depending on your kimchi and any added gochujang or gochugaru. You can adjust the heat to your preference by adding more or less chili paste or flakes. - What’s the best protein to add to Kimchi Fried Rice?
Popular protein options include diced Spam, tofu, chicken, bacon, or even a soft-boiled egg on top. Spam is a classic Korean-American favorite for this dish. - Can I make Kimchi Fried Rice vegetarian or vegan?
Absolutely! Use plant-based kimchi (without fish sauce or shrimp paste) and replace eggs and meat with tofu or extra veggies. It’s flavorful and filling either way. - How do I keep the rice from sticking to the pan?
Use a non-stick skillet or a well-seasoned wok, and be sure to heat the oil thoroughly before adding ingredients. Stir continuously and avoid overcrowding the pan.
🥢 Ready to Give It a Try?
If this recipe made your mouth water, go ahead and fire up that pan—your perfect bowl of Kimchi Fried Rice is just minutes away! 🍳
Tried it at home? Tag your creations with #MyKimchiFriedRice on social media or drop a comment below—I’d love to hear how you made it your own!
Simple Kimchi Fried Rice
Ingredients
- Base Ingredients:
- 1 cup day-old cooked rice short or medium grain preferred
- ½ cup chopped kimchi
- 2 tbsp kimchi juice
- 1 small onion diced
- 2 cloves garlic minced
- 1 –2 eggs scrambled into rice or fried on top
- 1 tsp soy sauce
- 1 tsp toasted sesame oil
- 1 tbsp neutral oil vegetable, canola, or sunflower
- Optional Add-ins:
- Diced Spam tofu, mushrooms, leftover meat, or frozen vegetables (like carrots or peas)
- Optional Garnishes:
- Chopped green onions
- Sesame seeds
- Seaweed flakes
- Gochugaru Korean chili flakes
- Gochujang Korean chili paste
Instructions
- Step 1: Prep Your Ingredients
- Dice the onion, mince the garlic, and chop the kimchi.
- Thaw frozen vegetables if using.
- Break apart cold rice with hands or a spoon to avoid clumps.
- Step 2: Heat Your Pan
- Heat a skillet or wok over medium-high heat.
- Add 1 tbsp of neutral oil and let it shimmer.
- Step 3: Sauté the Aromatics
- Add diced onion and garlic.
- Cook for 1 minute, stirring, until fragrant and translucent.
- Step 4: Add Proteins or Veggies
- Add Spam, tofu, mushrooms, or other add-ins.
- Stir-fry for 2–3 minutes until lightly crisped.
- Step 5: Stir in the Kimchi
- Add chopped kimchi and kimchi juice.
- Cook for 1–2 minutes to deepen the flavor and reduce moisture.
- Step 6: Add the Rice
- Add cold rice to the pan.
- Break up clumps with a spatula and mix well.
- Gently press rice into the pan to create a crispy bottom layer.
- Step 7: Season the Dish
- Add 1 tsp soy sauce and 1 tsp sesame oil.
- Optional: Stir in gochujang or sprinkle gochugaru for extra heat.
- Taste and adjust seasoning.
- Step 8: Add Eggs
- Option 1: Push rice to one side, scramble eggs in the pan, then combine.
- Option 2: Fry eggs separately and place on top of each serving.
- Step 9: Garnish and Serve
- Turn off heat.
- Top with green onions, sesame seeds, and seaweed flakes.
- Serve hot and enjoy immediately.
Notes
🧊 Storage & Reheating Tips
Storage:- Store in an airtight container in the refrigerator for up to 4 days.
- Reheat in a skillet with a splash of oil over medium heat to restore texture.
- Microwave on medium for 1–2 minutes, covered, stirring halfway through.